/images/logo.png
A Network Blog by a Network Engineer

Junos Policy-Based VPNs – Part 2 of 4 – Proxy-Identity

This is the second post in the Policy-Based VPN series. In our first post we configured a policy-based VPN using security policies tied to the UNTRUST interface. For this post, we will be using a route-based configuration that allows interoperability to the remote side configured as a policy-based VPN. This will also allow us to define a dedicated security zone for the VPN, hence helping to increase security. What we will be using in this post are proxy IDs to define local and remote networks.

The first part of this post is the setup of the labs, just like we did last time. If you want, you can skip down to where we delete the old configuration to see how the new configuration is done.

To recap, there are four different VPN configurations in this series:

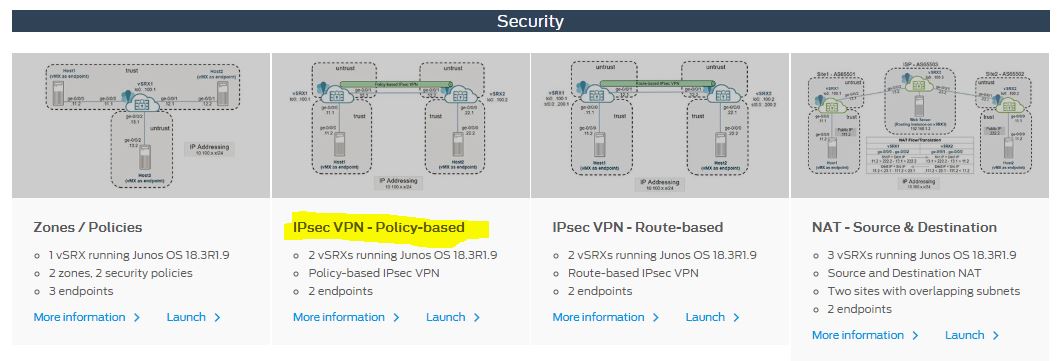
Again, I will be using Juniper vLabs IPSEC VPN Policy-based lab for these posts. Feel free to head on over there and spin the lab up yourself when you are ready and kick the tires on these different configurations. Below is our diagram for the lab topology.

Junos Policy-Based VPNs – Part 1 of 4 – Security Policies

Policy-based VPNs are a pain most of the time, especially when compared to route-based VPNs. Many of the policy-based VPNs I run across today are legacy configurations dealing with ASA or interop between vendors where the one side only supported policy-based VPNs.

With Junos, there are four ways to configure VPNs to support policy-based VPN requirements. Two are a true policy-based VPN and the other two are actually route-based VPNs that support policy-based VPNs.

The four different VPN configuration options are:

  • Uni-directional policy-based VPN (Covered in this post)
  • Bi-directional policy-based VPN (Covered in this post at the end)
  • IPSEC proxy-identity route-based (Coming soon)
  • IPSEC Traffic selectors route-based (Coming soon)

There will be four posts in this series. The first post will cover the first two items listed above, the second will cover proxy-identity, the third will cover traffic-selectors, and the last post will be a wrap-up recap with pros and caveats to each option.

I will be using Juniper vLabs IPSEC VPN Policy-based lab for all these posts. We will only be working with one SRX to emulate what setting up a VPN would really be like. Feel free to head on over there and spin the lab up yourself when you are ready and kick the tires on these different configurations. Below is our diagram for the lab topology.

Pi-Hole for home DNS

Pi-hole? Huh? DNS? What I am going on about now you may ask. Pi-hole is billed as a “Network-wide Ad Blocking,” a black hole for Internet Advertisements. While it is that, it can be much much more – I can also help you secure your network to some extent.

For me, I am using it to help filter out some advertisements, but also using it to block tracking websites, known malware sites, as well as tracking what my internal clients are talking to.

Want to know how effective a tool like Pi-hole can be, let’s look at the 24-hour stats for my home network below. Keep in mind that there are 5 of us here, I work from home, and we stream everything on Rokus.

Juniper vLabs

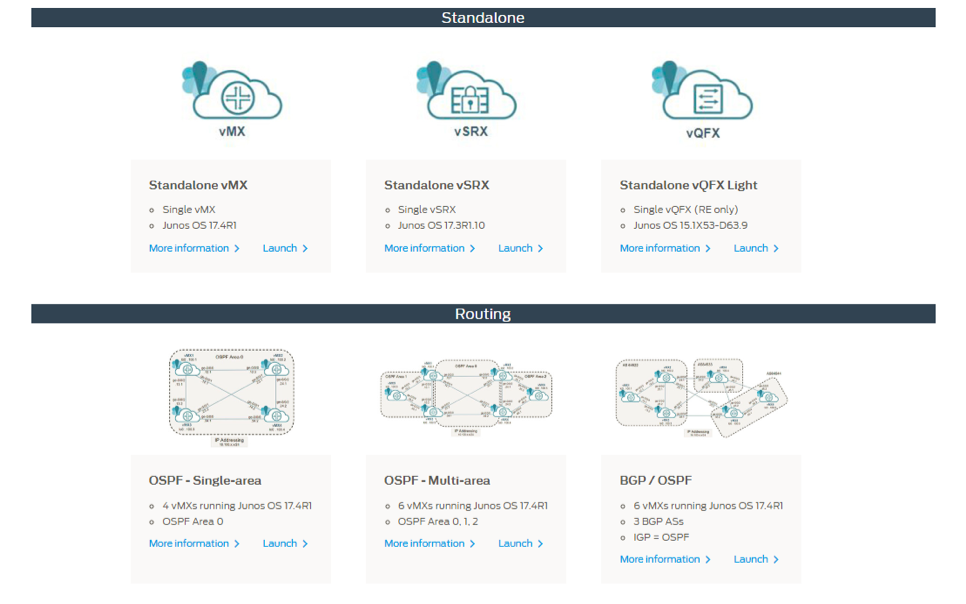
A little over a year ago Juniper released Juniper vLabs. What vLabs is, is a place where you can safely lab and learn on Juniper virtualized hardware. When it was first launched there where about six labs available:

Standalone
Standalone vMX
Standalone vSRX
Standalone vQFX
Routing
OSPF – Single-area
OSPF – Multi-area
BGP / OSPF

If you check out Juniper vLabs today, you will find 20 labs available across five different topic areas. With these labs, and I did test out a few, you do need to “reserve” them and you get them for about 3-hours. Everyone that I “reserved” was available immediately and ready to go in about 15 minutes. I did receive e-mails when I reserved when the lab was ready, and when I ended it.

Junos Primary and Preferred Interface Commands

This blog post was spurred on by a recent real-world experience where I had to configure a primary IP address on an ISP facing interface. In this scenario, we needed to maintain the corporate ARIN assigned IP on an interface for VPN traffic to originate from and terminate on. Yet the ISP would only allow the customer to use the ISP provided IP address for BGP peering.

Fair warning, this is a bit of a long one and has a twist and turn. Also, take note that I am using interface overload NAT only for demonstration purposes.

There was some discussion around the primary and preferred interface commands, so why not learn more about it and, in turn, write a blog post about it.

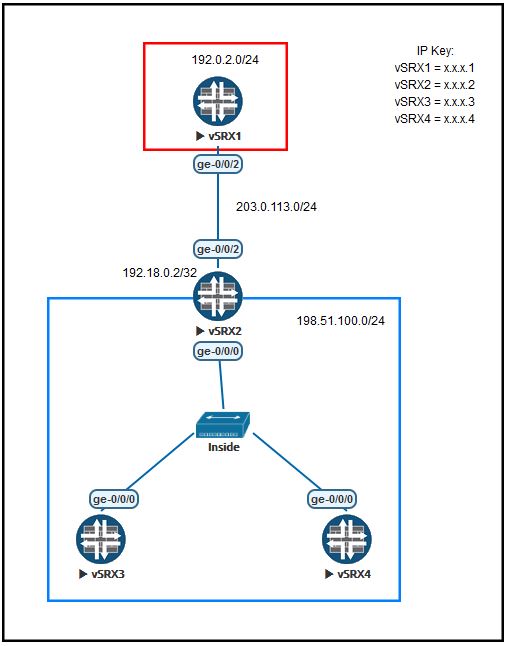
Below is the lab diagram we will use for this blog post. I have preconfigured the devices to pass traffic with vSRX2 set to NAT all internal traffic to its outside (ge-0/0/2) interface. vSRX1, vSRX3, and vSRX4 are all configured in packet mode to keep the configurations simple. You can find a copy of the eve-ng topology, starting configs, and ending configs at the end of this post.

Juniper JNCIE-CLOUD Announced

I know we all have our cloudy day (some of us more than others) yet if you are a cloud expert now is your opportunity to prove it. Juniper has announced a new expert-level certification called JNCIE-Cloud.

Now if you are like me, you are probably like what the heck and why do we need this. Why do we need an expert level on cloud certification? Well when you start to consider the number of companies today that are moving to a hybrid cloud data center, it does make sense. The challenge that companies face to intelligently integrate the public and private clouds is staggering.

What do I run at home?

I have decided to do a little series on “What I run at home” with regards to networking, labs, and other assorted items that may be of interest. As a techie, it is always interesting to find what other techies run at home.

Well, I figured it was my time to share as I have been running the same network at home for a few years and have been pleased with the performance and management.

Juniper NXTWORK Hack-a-Thon

Ein and Jkitty talking about hacking

Over the past couple of years, Juniper has hosted a Hackathon at start of NXTWORK. This event is a great way to meet new people, start to get in the groove of challenging technology and just have some fun. When you register for NXTWORK, there is an option to sign up for the Hackathon.

In 2017 we did a Red Team / Blue Team attach where the RED team was using Kali Linux to attach the Blue Team. We had to take advantage of OS and vendor exploits to gain access. The Blue Team was there monitoring and reporting on our activities as they could not stop (rules) us from entering their network.

Juniper JNCIE-ENT Refresh

A few months ago Juniper announced that the JNCIE-ENT lab exam would be getting a much-needed refresh. On November 1st will be saying goodbye to JPR-943 and hello to JPR-944. This new lab exam is also a 6-hour hands-on lab instead of the previous 8-hour hands-on.

I do plan to update my JNCIE-Workbook based on this new lab, yet have no definitive timeline to accomplish that task. While my workbook may not cover everything in the syllabus (EVPN, Space, Scripts) it seems as though much of it is still relevant. In honor of the new exam, here is a link to purchase the workbook for $49.99, that is half-off the normal price. Each purchase from LeanPub comes with a 30-day, money-back guarantee.

Testing at Juniper NXTWORK

Earlier this week I did a post on Juniper NXTWORK and talked about the event. There is a lot going on that week, but one of the best things is the FREE JCNP level certification testing that is available. I wanted to elaborate a bit more on the testing, how to register, and what to expect.

Let us start with the JNCIE lab exams that are available for 50% off. All of the JNCIE labs – ENT JPR-944, -CLOUD JPR-911, -SEC JPR-933, -DC JPR-980, and -SP JPR-960 – are available on the November 9th and 10th. The exam times are from 9 AM to 6 PM both days, except for the new ENT and CLOUD which are 6-hour exams. To register for a JNCIE lab exam, you must have the required JNCIP level certification and e-mail certification@juniper.net with your Full Name, Cert Manager ID (JPRxxxx), Exam Name, and what date you would like to take it. There is limited seating, so they are first come first serve.